There’s nothing quite like stumbling into a tiny bathroom at 2 a.m., half-asleep, and fumbling for a switch that blinds you like a police interrogation. Or worse — the switch isn’t there, and you’re feeling along the wall like a pirate in a cave. Honestly, small bathroom lighting design for night visibility is one of those things nobody thinks about until they’ve nearly cracked a toe on the toilet base. Let’s fix that.
Small bathrooms are tricky. They’re compact, often windowless, and every lighting choice feels like a compromise between function and style. But here’s the deal: you can have both. You just need a layered approach — one that respects your sleep-addled brain and your design sensibilities. We’re going to walk through the best ways to light up your tiny space for those midnight trips, without turning your bathroom into a landing strip.
Why Night Visibility Is Different From Regular Lighting
Daytime lighting is about clarity. You want to see every pore, every smudge, every stray hair. Night lighting is about orientation. You don’t need to inspect your pores at 3 a.m. — you need to know where the sink is, avoid the bathmat edge, and not wake up fully. That’s a different psychological game entirely.
Your eyes are adapted to darkness. A sudden 800-lumen blast from a ceiling fixture doesn’t just hurt — it jolts your circadian rhythm. Melatonin production drops, and suddenly you’re wide awake at 3:15 a.m., scrolling your phone. Not ideal. The goal is low-level, diffused light that guides you without shouting.
Think of it like a nightlight for grown-ups, but with better design credentials. You want just enough illumination to see the silhouette of the toilet, the edge of the counter, and maybe the color of your towel if you’re fancy.
The Core Problem With Small Bathrooms
Space is the enemy of good lighting. You can’t install a chandelier (well, you could, but it’d be ridiculous). You’ve got one ceiling fixture, maybe a vanity light, and that’s it. The walls are close, the ceiling is low, and every fixture you add eats into visual square footage.
But the real issue? Glare and shadows. A single overhead light in a small room creates harsh shadows behind the mirror, under the sink, and around the corners. That’s dangerous at night. You think you’re stepping onto the bathmat, but it’s actually a shadow. Ouch.
So the solution isn’t more light — it’s smarter placement. Let’s break down the zones you need to cover.
Zone 1: The Floor Path
This is your primary navigation lane. From the door to the toilet, and maybe to the sink. You need low-level, continuous light along this path. Not a spotlight — that’s overkill. Think of it like runway lights on a tiny scale.
Best options? Plug-in LED strip lights along the baseboard, or battery-operated puck lights tucked under the vanity toe-kick. They cast a soft glow on the floor, just enough to define edges. Some people use motion-sensor nightlights that plug into outlets near the baseboard — those work great too, as long as they’re not too bright.
One thing to avoid: anything that flickers. Flickering at night is like a strobe light for your tired brain. Go with steady, warm-white LEDs (2700K to 3000K). Cool white (5000K+) mimics daylight and will wake you up more than you want.
Zone 2: The Mirror Area
This is where most people make the mistake. They think, “I need a bright vanity light for night visits.” No. You need a dim vanity light that can go bright when you’re getting ready in the morning. The best approach is a dimmer switch on your main vanity fixture. That way, you can set it to 10% at night — just enough to see your face if you stumble in for a glass of water.
If you don’t want to rewire, consider a smart bulb. You can control it from your phone or set a schedule. Honestly, setting a “night mode” at 15% brightness is a game-changer. You’ll still see your reflection, but it won’t feel like a spotlight.
Another idea? Backlit mirrors. These have LED strips built into the frame, and many come with dimming options. They cast an even, shadow-free glow that’s perfect for low-light bathroom visits. Plus, they look sleek — like something from a hotel spa.
Zone 3: The Shower or Tub
You probably don’t shower at night, but if you do — or if you have a tub for late-night soaks — you need something safe. Water and electricity don’t mix, so you need fixtures rated for damp or wet locations. Look for IP44 or higher rated LED recessed lights in the shower ceiling. But here’s the trick: don’t put them on the same switch as the main light. Give them their own switch or dimmer, so you can have a soft, ambient glow while you’re in the tub, without the harsh overhead.
If you’re renting or don’t want to mess with wiring, a waterproof LED shower light that sticks on with suction cups is a decent temporary fix. Just make sure it’s rated for wet areas, and don’t rely on it as your only source.
Lighting Layers: The Secret Sauce
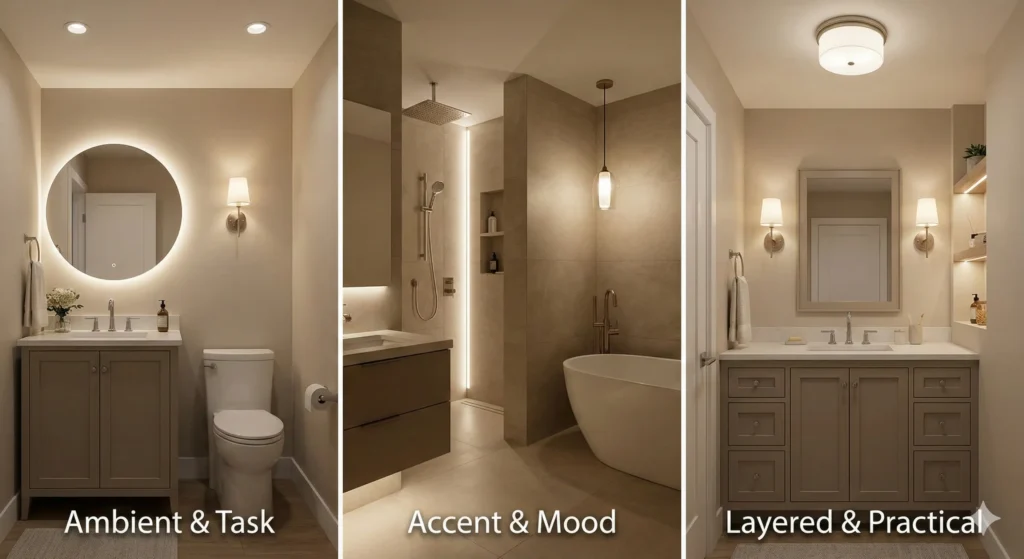
Professional lighting designers talk about “layers” — ambient, task, and accent. In a small bathroom, you need all three, but at night, you’re mostly using the ambient layer with a twist.
Here’s a simple breakdown:
- Ambient (base) light — This is your ceiling fixture or recessed lights. At night, it should be dimmable, set to the lowest comfortable level.
- Task light — The vanity light for grooming. At night, you don’t need this, unless you’re doing a midnight skincare routine (no judgment). Dim it way down.
- Accent light — This is your night-safety hero. Think LED strips, puck lights, or a small wall sconce with a low-wattage bulb. It’s not for seeing details; it’s for defining space.
When you combine a dimmed ambient light with a soft accent light, you get a warm, cocoon-like glow that’s easy on the eyes. It’s like the bathroom version of a campfire — comforting, not blinding.
Sensor Lights: The Hands-Free Hero
Motion sensors are a small bathroom’s best friend. You walk in, the light comes on, you do your business, you leave, it turns off. No fumbling for switches, no bright flashes. The trick is finding one with a low light threshold and a short timer.
Look for models that only activate in the dark — some have a built-in photocell that ignores daylight. Set the timer to 30 seconds or a minute, so it doesn’t stay on all night. And position it near the floor, not the ceiling. A ceiling-mounted motion sensor will pick you up from across the room, but a floor-level one catches your foot movement, which is more natural for nighttime.
One caveat: avoid sensor lights that are too bright. Some are marketed as “security lights” and they’ll blast 1000 lumens into your face. You want something around 20-50 lumens — just enough to see the toilet paper roll.
Color Temperature Matters More Than You Think
Let’s talk about warm vs. cool light for a second. It’s not just about preference — it’s biology. Warm light (2700K-3000K) suppresses melatonin less than cool light (4000K-5000K). That means if you use a cool white bulb at night, you’re telling your brain it’s morning. Bad idea.
Stick to warm white for all your night-friendly fixtures. Even your dimmable main light should be warm-toned. If you have a smart bulb, you can even schedule it to shift to a warmer, dimmer setting after 9 p.m. — that’s a pro move.
And here’s a weird but true fact: amber or red-tinted lights are even better for nighttime. They have almost no effect on your circadian rhythm. Some people use red LED strips under the vanity for a subtle, sci-fi glow. It’s not for everyone, but if you’re serious about sleep quality, it’s worth trying.
Practical Ideas You Can Implement Today
Okay, enough theory. Here’s a list of actionable, budget-friendly options you can try this weekend:
- Plug-in LED nightlights — The classic. Get the ones with a warm glow and a photocell. Place them near the baseboard, not at eye level.
- Under-cabinet LED tape — If you have a floating vanity, stick LED strip lights underneath. They cast a soft pool of light on the floor.
- Dimmer switch — Replace your standard wall switch with a dimmer. It’s a $20 fix that changes everything. Seriously, do this first.
- Smart bulbs — Set a “night mode” schedule. You can even use voice control to say “Hey Google, bathroom at 10%” — that’s the future, and it’s here.
- Battery-operated puck lights — Stick them inside a cabinet or under a shelf. No wiring, no fuss. Just replace the batteries every few months.
- Wall sconce with a low-wattage bulb — If you have a spare wall, a small sconce with a 2-watt LED bulb adds a design element and a night glow.
You don’t need all of these. Pick two or three that fit your space and your comfort level. The goal is a cohesive, low-light environment — not a Christmas tree.
A Quick Comparison: Fixture Types for Night Use
Let’s put some numbers on it. Here’s a simple table to help you decide:
| Fixture Type | Typical Brightness (Lumens) | Best For | Night Rating |
|---|