Let’s be real for a second. Wildfires aren’t just a California problem anymore. They’re knocking on doors in Colorado, Oregon, even parts of the Midwest. And the scariest part? It’s not always the flames that get you — it’s the embers. Those tiny, glowing specks can travel miles ahead of the fire front, landing on your roof like little time bombs. So, if you’re thinking about re-roofing or just want to sleep better at night, you need to understand wildfire resistant roofing materials and ember proofing. Honestly, it’s not as complicated as it sounds. Let’s break it down.
Why Your Roof is the Weakest Link
Think of your roof as a shield. A bad roof is like a rusty shield — looks okay from a distance, but one good hit and it crumbles. In a wildfire, embers pile up in gutters, slip under shingles, and ignite dry debris. Once that happens, your attic becomes a chimney. And then? Well, you don’t want to think about “and then.”
Here’s the deal: Class A fire-rated roofing is the gold standard. It’s not just about the material itself — it’s about how the whole system behaves under fire exposure. But not all Class A roofs are created equal. Some are better at stopping embers than others. Let’s look at the top contenders.
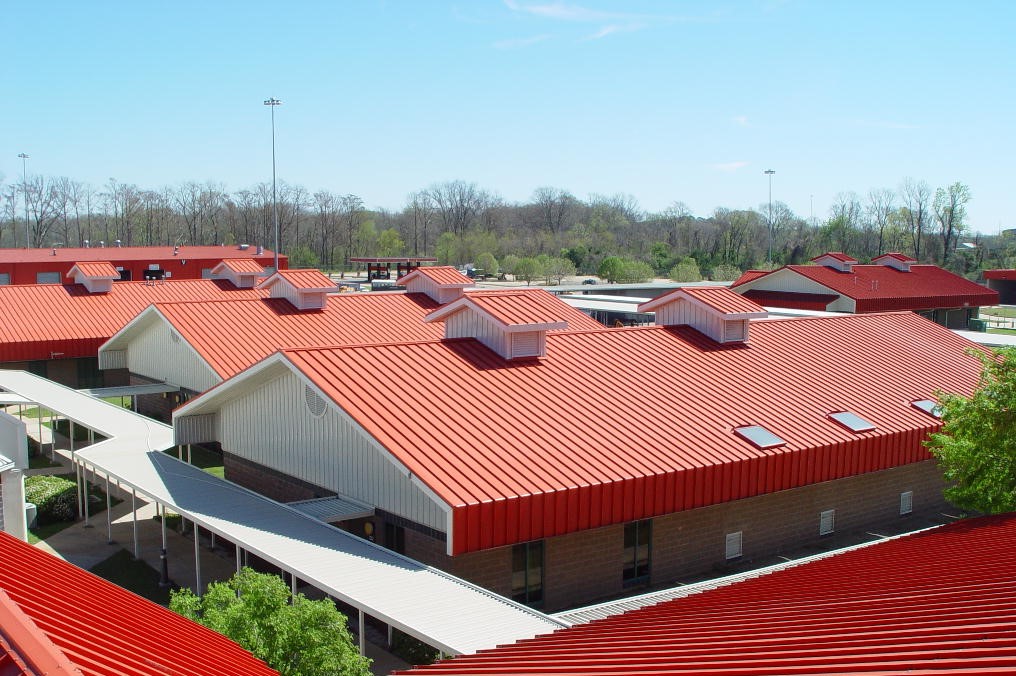
Metal Roofing: The Ember-Proof Heavyweight
Metal roofs — steel, aluminum, or copper — are basically non-combustible. They don’t catch fire. Period. But wait, there’s a catch. If the metal is thin or the seams aren’t sealed, embers can sneak in through gaps. That’s why standing seam metal roofing is the way to go. It has fewer exposed fasteners and tighter joints. Plus, it’s slick — embers slide right off like water off a duck’s back.
One thing to watch: paint or coatings. Some cheaper metal roofs have a painted finish that can blister or degrade under intense heat. Go for coil-coated or Kynar 500 finishes — they hold up better. And yeah, metal can be noisy in the rain, but that’s a small price for peace of mind.
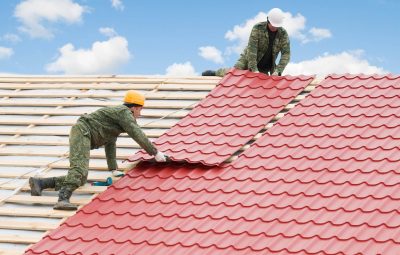
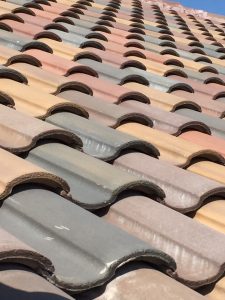
Clay and Concrete Tiles: Heavy, Durable, and Fire-Resistant
Clay and concrete tiles are naturally fire-resistant. They’re made from earth, after all. They won’t burn, melt, or drip. But — and this is a big but — they’re heavy. Your roof structure might need reinforcement. And the real vulnerability? The gaps underneath. Embers can blow under tiles and ignite the underlayment or decking.
The fix? Ember-resistant underlayment. Think of it as a second skin. Use a Class A rated underlayment, like a self-adhering modified bitumen or a fire-resistant synthetic felt. Also, seal the eaves and ridges with metal flashing or a non-combustible bird stop. It’s the little details that matter.
Slate Roofing: The Old-School Beauty
Slate is stone. Stone doesn’t burn. Simple, right? Well, almost. Slate is incredibly durable and fire-resistant — it’s been used for centuries. But it’s expensive and brittle. A falling tree branch can crack it. And like tile, the gaps under the slates are an entry point for embers. You’ll need the same underlayment and flashing strategy. Honestly, if you’ve got the budget and the structural support, slate is a top-tier choice. But it’s not for everyone.
What About Asphalt Shingles? (The Most Common Roof)
Ah, the old standby. Asphalt shingles are everywhere because they’re cheap and easy to install. But are they wildfire resistant? Well, it depends. Class A asphalt shingles exist — they’re treated with fire-retardant chemicals or have a fiberglass mat base. But here’s the thing: they can still ignite if embers accumulate. The granules can fall off over time, exposing the asphalt underneath. And once that happens, you’ve got a problem.
If you’re stuck with asphalt, go for impact-resistant, Class A rated shingles with a high granule density. And please — for the love of safety — keep your gutters clean. Dry leaves and pine needles in a gutter are basically kindling waiting for a spark.
Ember Proofing: The Art of Sealing the Cracks
Okay, so you’ve got a Class A roof. Great. But a roof is only as good as its weakest gap. Ember proofing is about closing every possible entry point. Think of it like this: if a mosquito can get in, an ember can too. And embers are a lot more destructive.
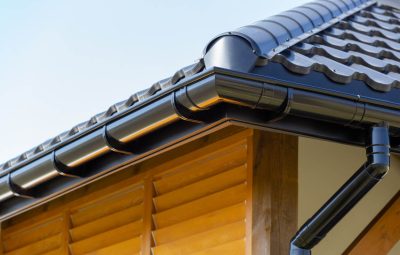
Gutters and Downspouts
This is ground zero. Embers love dry leaves in gutters. Install non-combustible gutter guards — metal mesh or solid covers. And use metal gutters, not vinyl. Vinyl melts and can actually drip burning plastic onto your siding. Yeah, that’s a thing.
Eaves and Soffits
Open eaves are like open doors. Embers get sucked into the attic through soffit vents. The fix? Install 1/8-inch metal mesh over all vents. Not 1/4-inch — that’s too big. And use corrosion-resistant stainless steel or aluminum. Also, consider enclosing your eaves with non-combustible materials like stucco or metal.
Valleys and Flashings
Roof valleys are where water — and embers — collect. Use metal flashing (steel or copper) in valleys, not asphalt. And seal all seams with a fire-resistant caulk or mastic. It’s tedious work, but it’s worth it.
Chimneys and Skylights
Chimneys need a spark arrestor — a metal mesh cap that stops embers from flying out. And skylights? Use tempered glass or dual-pane units with a metal frame. Plastic skylights are a no-go. They can melt or crack under radiant heat.
Quick Comparison Table: Roofing Materials at a Glance
| Material | Fire Rating | Ember Risk | Cost (per sq. ft.) | Durability |
|---|---|---|---|---|
| Standing Seam Metal | Class A | Very Low | $8–$16 | 40–70 years |
| Clay/Concrete Tile | Class A | Low (with proper underlayment) | $10–$20 | 50–100 years |
| Slate | Class A | Low (with proper underlayment) | $15–$30 | 75–200 years |
| Class A Asphalt Shingles | Class A | Moderate (if debris accumulates) | $4–$7 | 20–30 years |
| Wood Shakes (untreated) | Class C or unrated | High | $6–$12 | 20–30 years |
Note: Costs are rough estimates and vary by region and installation complexity. Always get multiple quotes.
DIY vs. Professional Installation — A Honest Take
Look, I’m all for a good DIY project. But roofing is not the place to save a few bucks. A professional roofer knows how to flash valleys, seal vents, and install underlayment correctly. One missed gap can compromise the whole system. That said, you can DIY ember proofing tasks like cleaning gutters, installing mesh over vents, and trimming trees. Just know your limits.
And hey — if you’re in a high-risk zone, some insurance companies offer discounts for wildfire-resistant roofs. Check with your agent. It might offset the higher upfront cost.
Beyond the Roof: The Whole-Home Approach
Here’s a thought: a wildfire-resistant roof is amazing, but it’s not a silver bullet. Embers can also ignite through open windows, wooden decks, or dry vegetation next to the house. So, while you’re at it, consider non-combustible siding (stucco, fiber cement, or metal), tempered glass windows, and a defensible space of at least 5 feet around your home. It’s all connected. Your roof is just the crown jewel.
One more thing — don’t forget the attic. If embers get in through a vent, they can smolder for hours before igniting. Install a heat-activated attic vent or a fire-rated vent cover. It’s a small investment for a huge peace of mind.
The Final Spark — Why This Matters Now
Wildfire seasons are getting longer. Hotter. More unpredictable. It’s not about if a fire will come — it’s about when. And when it does, your roof is the first line of defense. Choosing the right material and sealing every gap isn’t just about code compliance. It’s about buying time. Time for firefighters. Time for your family to evacuate. Time for a miracle, if you believe in those.
So, sure, metal or tile might cost more upfront. But compare that to losing everything. Suddenly, the math gets real simple. Your roof isn’t just a roof — it’s a promise. A promise that you’ve done everything you can to protect what matters most.
And honestly? That’s a promise worth keeping.